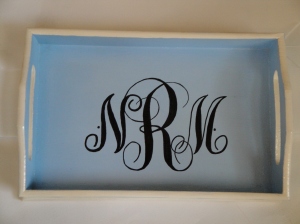
This week while I was in Richmond visiting my family, I decided to get some crafting accomplished! My two projects: shell topiaries (which are not quite finished yet; I will post the how-to for them as soon as they are), and a monogrammed tray. I wanted to make a gift for one of Jason’s cousins who graduated from high school and will be heading to UNC in the fall. A wooden tray at the craft store caught my eye; I thought it would be cute to hand-paint in the school’s colors and add her monogram, maybe to set on a dresser as a small catch-all for jewelry, etc.? I also got one for myself to eventually paint and use as a key tray on a side table just inside our front door. Here is the finished product:
…and the How-To:
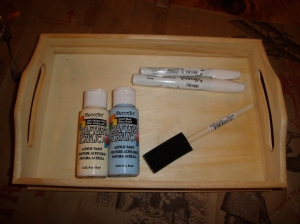
Materials needed to get started:
Small wooden tray, paint colors of choice, small foam brush, paint pens (white Sharpie paint pens are shown here, but I ended up using black for the monogram)
1. Paint the tray in colors of your choice. I used Carolina blue for the bottom and sides of the tray, and antique white for the edges and inside of handles to give it some detail. The tray required about 2 coats of paint, and I had to use some thinner paint brushes I had on hand to do touch-ups.
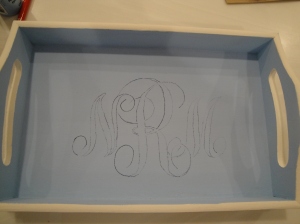
2. After allowing the paint to dry (I waited overnight just to make sure), I used carbon copy paper to trace the monogram–my mom had a piece she had kept since high school!–but you can use any sort of copy or tracing paper. I cut the copy paper down to the size of the monogram, placed the monogram on top, and used painter’s tape to secure both in place on the bottom of the tray.
Please note: I created the monogram in Microsoft Word. If you would like further information on how to do this, please email me and I’ll give you the full directions!
3. Using a pencil, *lightly* trace over the monogram so that it transfers on the bottom of the tray. I say lightly because it really doesn’t take a lot of pressure to transfer, and you don’t want it so dark that it’s hard to paint over.
4. Once the monogram is traced, paint pen away! I used a black paint pen, and then a medium-tip black Sharpie to do some of the finer details.
5. After allowing the paint pen to dry, I sprayed with ClearCote High-Shine glaze to give it a polished look. (Pardon my bare feet; I wanted to make sure I didn’t spray any glaze on my sandals!) 😉
Once dry, you have a lovely little personalized tray!
I had such a nice time in Richmond…lots of great food as always, like these yummy asparagus tarts my mom made:
and the hydrangeas in my parents’ garden were in full bloom. My absolute favorite flower always makes me smile!
I hope everyone has a wonderful weekend….I’m heading to the beach for the week with Jason’s family, and will post more upon my return!


I LOVE the trays you monogrammed. I’m thinking black and purple for Ravens season…you’ve officially inspired me! Great idea and you made it looks so easy. And you’ve reminded me that I’m waaaaaaay overdue for updating my blog. 🙂
Aww I am so glad you liked the idea….thanks for reading my blog! 🙂 What is your blog address? I’d love to check it out!
It’s babyventrudo.blogspot.com and don’t judge because I think my last post was in June, lol.
How did you do the monogram??
I created the monogram on Microsoft Word…my tutorial should help you! Thanks!